Worktrees pile up fast, especially when AI agents are making them for you. Arborist can spot the ones you’re probably done with and remove several at once, while making sure you don’t lose work you meant to keep.
Stale Worktrees
Arborist considers a worktree stale when any of these rules apply:
Pull request merged: the worktree’s pull or merge request was merged.
Pull request closed without merging.
Remote branch deleted: the worktree’s branch no longer exists on the remote.
No commits for 2 weeks, 3 weeks, or 30 days.
All four rules are on by default, with an inactivity threshold of 3 weeks. The merged and closed rules need a service account for the repository’s host so Arborist can look up its pull or merge requests. Arborist only counts a merged or closed request when it matches the commit checked out in the worktree, so reusing an old branch name for new work won’t make that work look merged.
Stale worktrees are marked with a badge in the sidebar. See the Interface Tour for what each badge means.
Changing the Rules
Set your default rules in the Worktrees pane of Settings, under Stale Worktrees. Every repository uses these defaults until you change its rules.
To use different rules for one repository, select the repository in the sidebar and change them in the Stale Worktrees section of the inspector. Click Use Defaults to go back to the rules from Settings.
Removing Worktrees
Click a repository’s name in the sidebar (or choose Show Info from the Repository menu, cmd-I) to open its info view. The Worktrees table lists every worktree in the repository with its section, last commit, linked pull or merge request, and status.
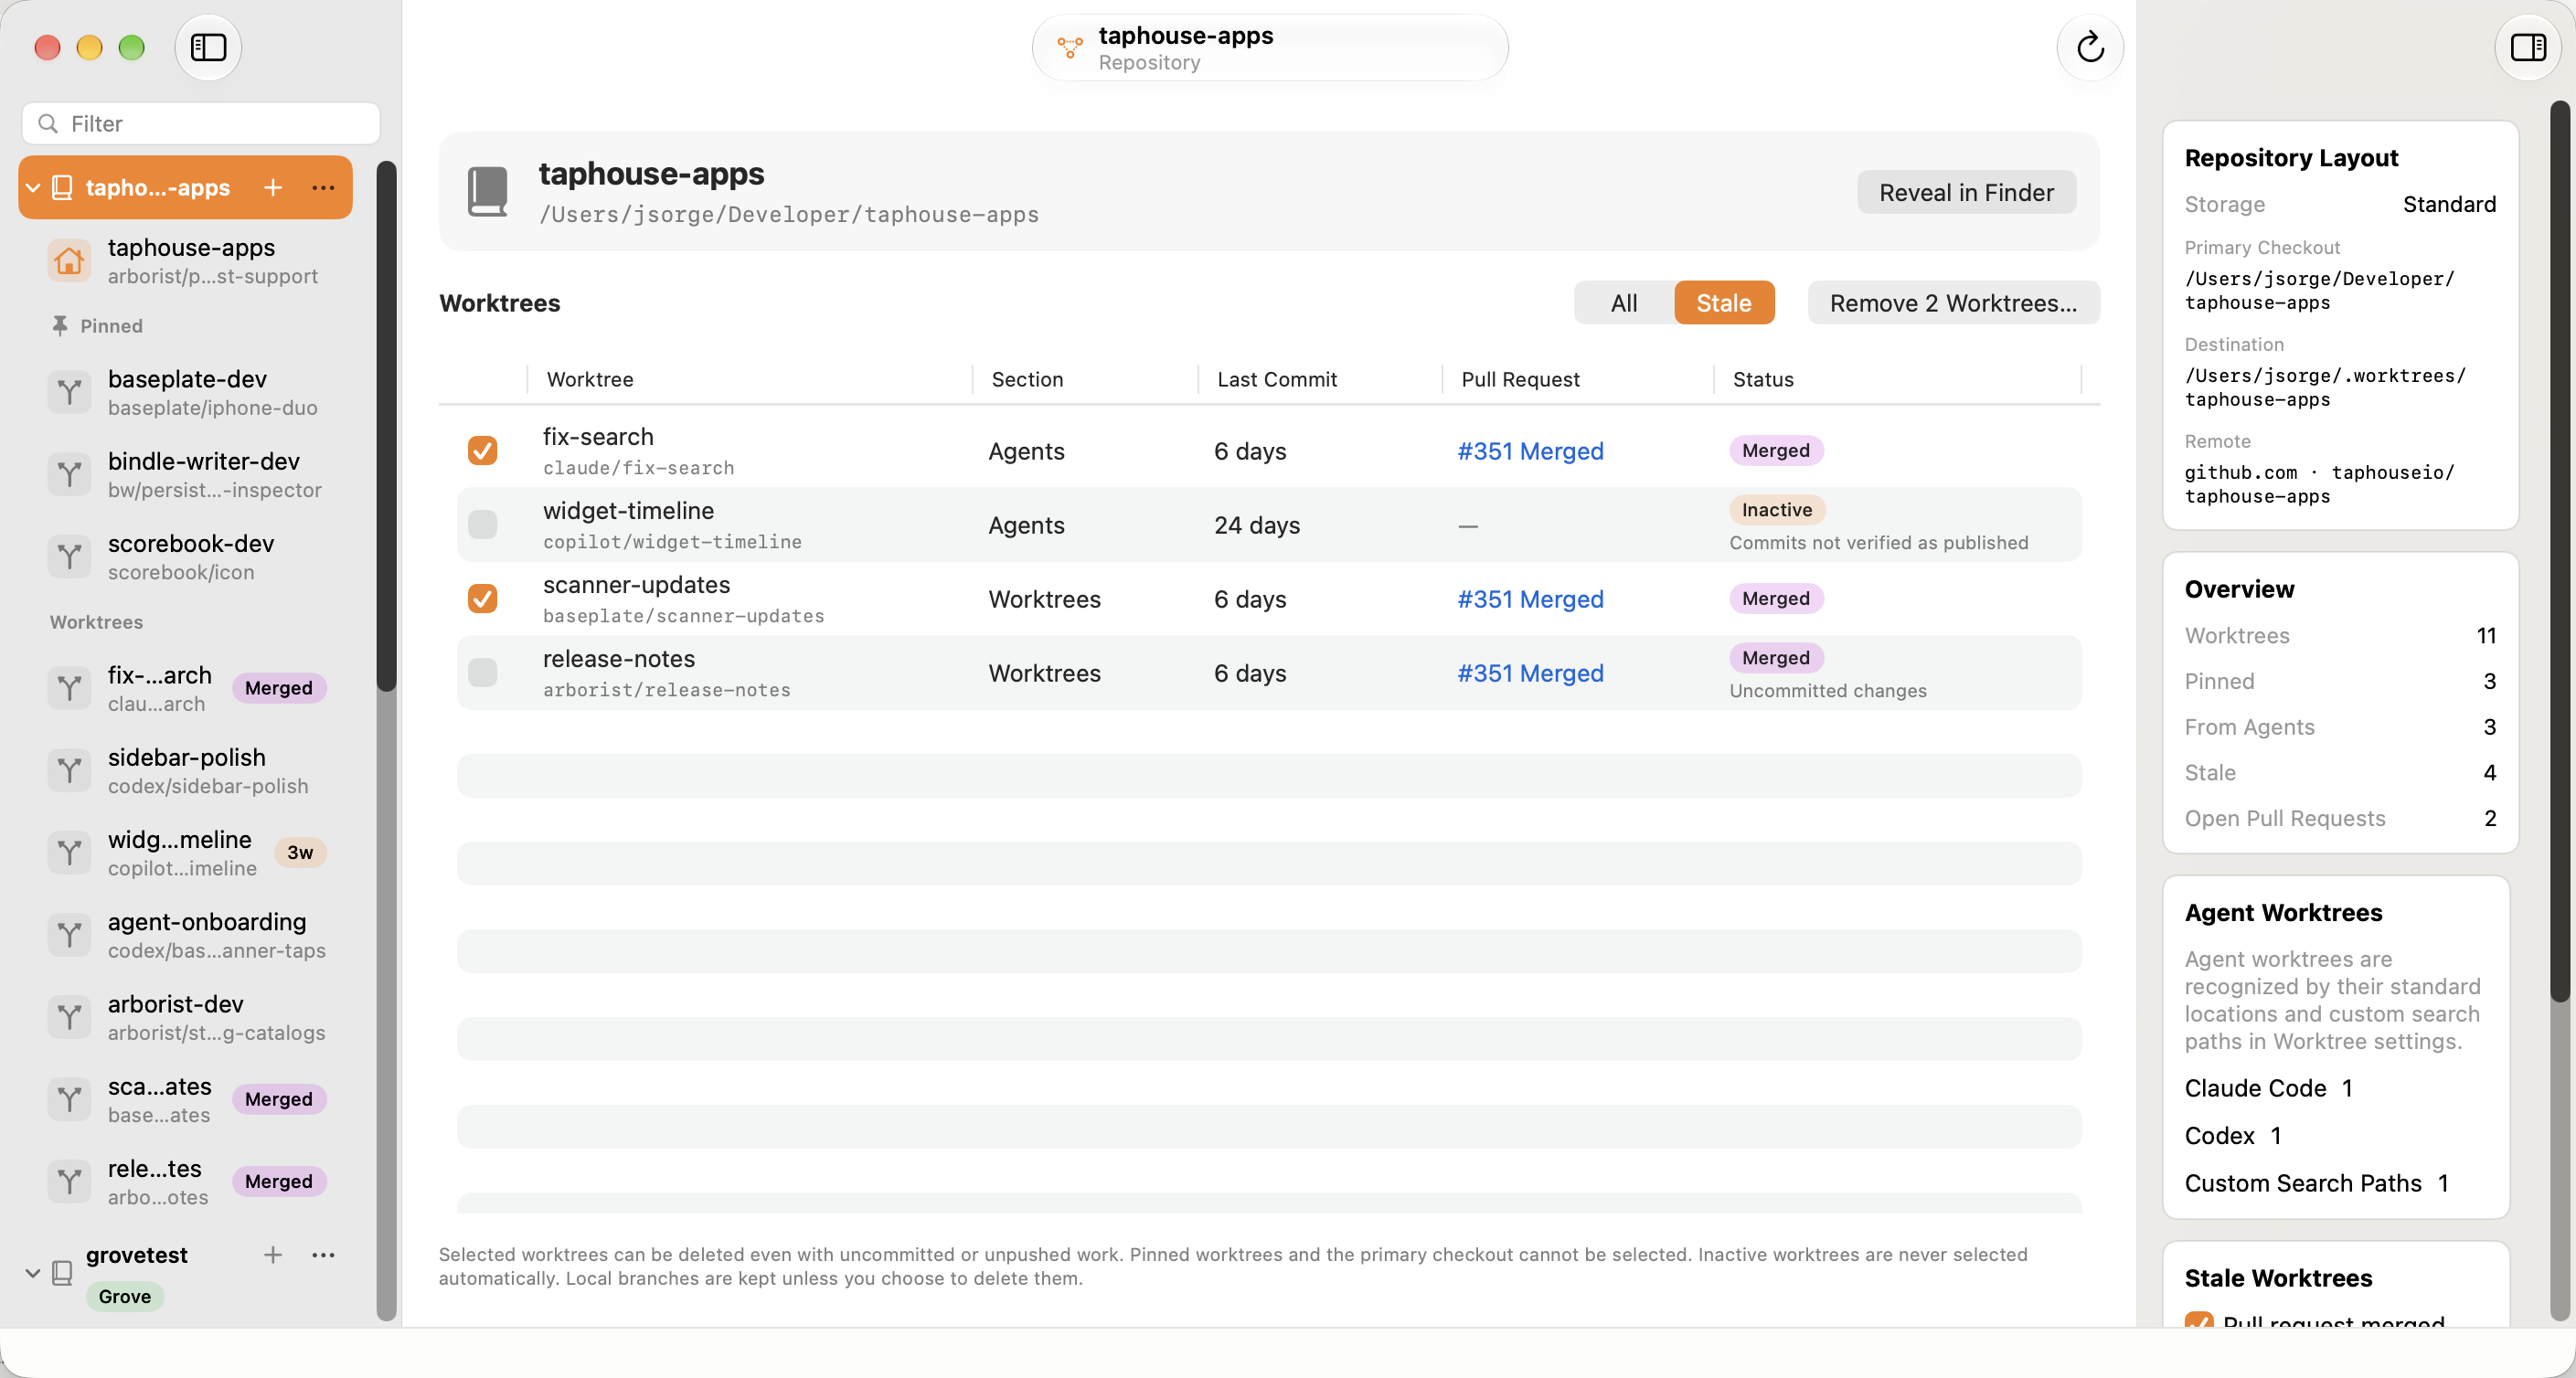
Choose Stale at the top of the table to show only stale worktrees. Arborist selects the ones that look safe to remove: worktrees with no uncommitted or unpushed work and no open pull or merge request. Worktrees that are stale only because they’ve been inactive are never selected for you.
Check or uncheck any worktrees you like. You can also switch back to All and pick worktrees yourself.
Click Remove Worktrees….
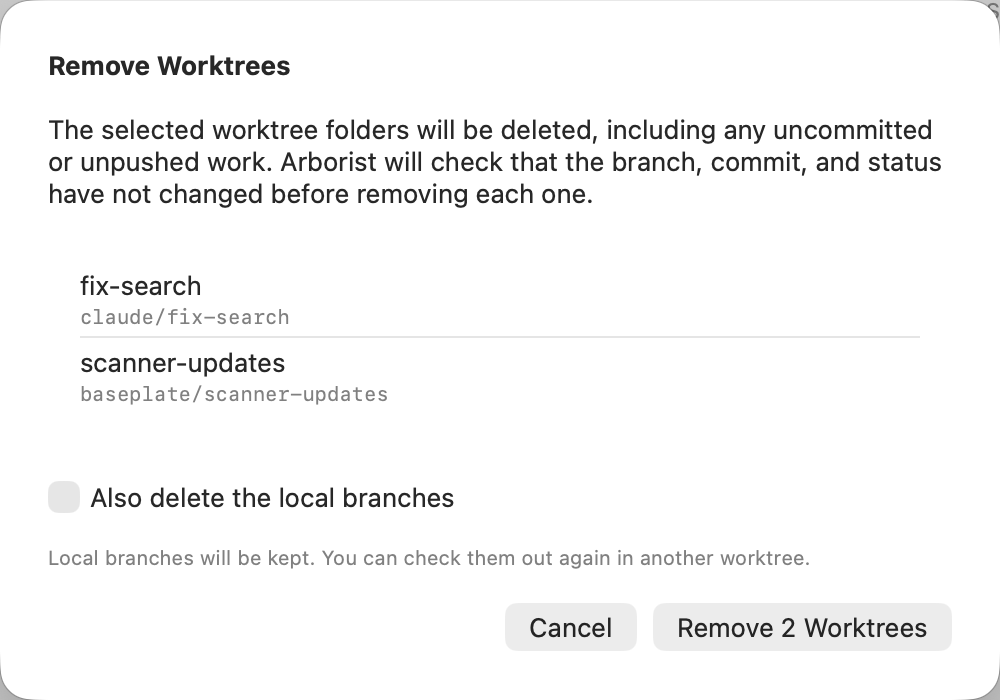
Review the confirmation. Check Also delete the local branches if you want those branches gone too. Remote branches are never touched. Without that option, the branches are kept so you can check them out again later.
Click Remove to confirm. When Arborist is done you’ll see a summary of what was removed and anything that couldn’t be.
Worktrees With Warnings
Some worktrees have a warning in the Status column, such as Uncommitted changes, Unpushed commits, or Worktree is locked. Hover over a row to see the full explanation. You can still select these worktrees and remove them, but their uncommitted or unpushed work will be deleted along with them. Arborist never selects them automatically, so check them only when you’re sure.
What’s Protected
The primary checkout shows a house icon and can’t be removed.
Pinned worktrees show a pin icon and can’t be selected. Unpin a worktree first if you want to remove it.
Right before removing each worktree, Arborist checks that its branch, commit, and status haven’t changed since you confirmed. If anything changed, for example because an agent was still working in it, the worktree is kept and listed as a failure in the summary.
Cleanup happens entirely on your Mac, so it works offline and doesn’t need your SSH agent to be unlocked.
Removing a Single Worktree
To remove just one worktree, select it and choose Delete Worktree… from the Worktree menu (cmd-Delete), or from the worktree’s context menu in the sidebar. The branch stays in the repository.
When a stale worktree is safe to remove, its inspector also shows a note saying it’s eligible for cleanup, with a Remove Worktree… button.