Arborist works best once it knows about the repositories you work in and the apps you use to work on them. The first time you open it, Arborist helps you set up both.
Adding Your Repositories
When you have no repositories in Arborist yet, the main window shows a list of repositories it found on your Mac under Recently Used on This Mac. These come from two places:
Projects you’ve worked on with Claude Code, Codex, or GitHub Copilot on the command line. These are listed first, along with how many chats each one has, and up to five of them are selected for you.
Git repositories in common developer folders in your home folder, such as
Developer,Projects,Code,src, andrepos.
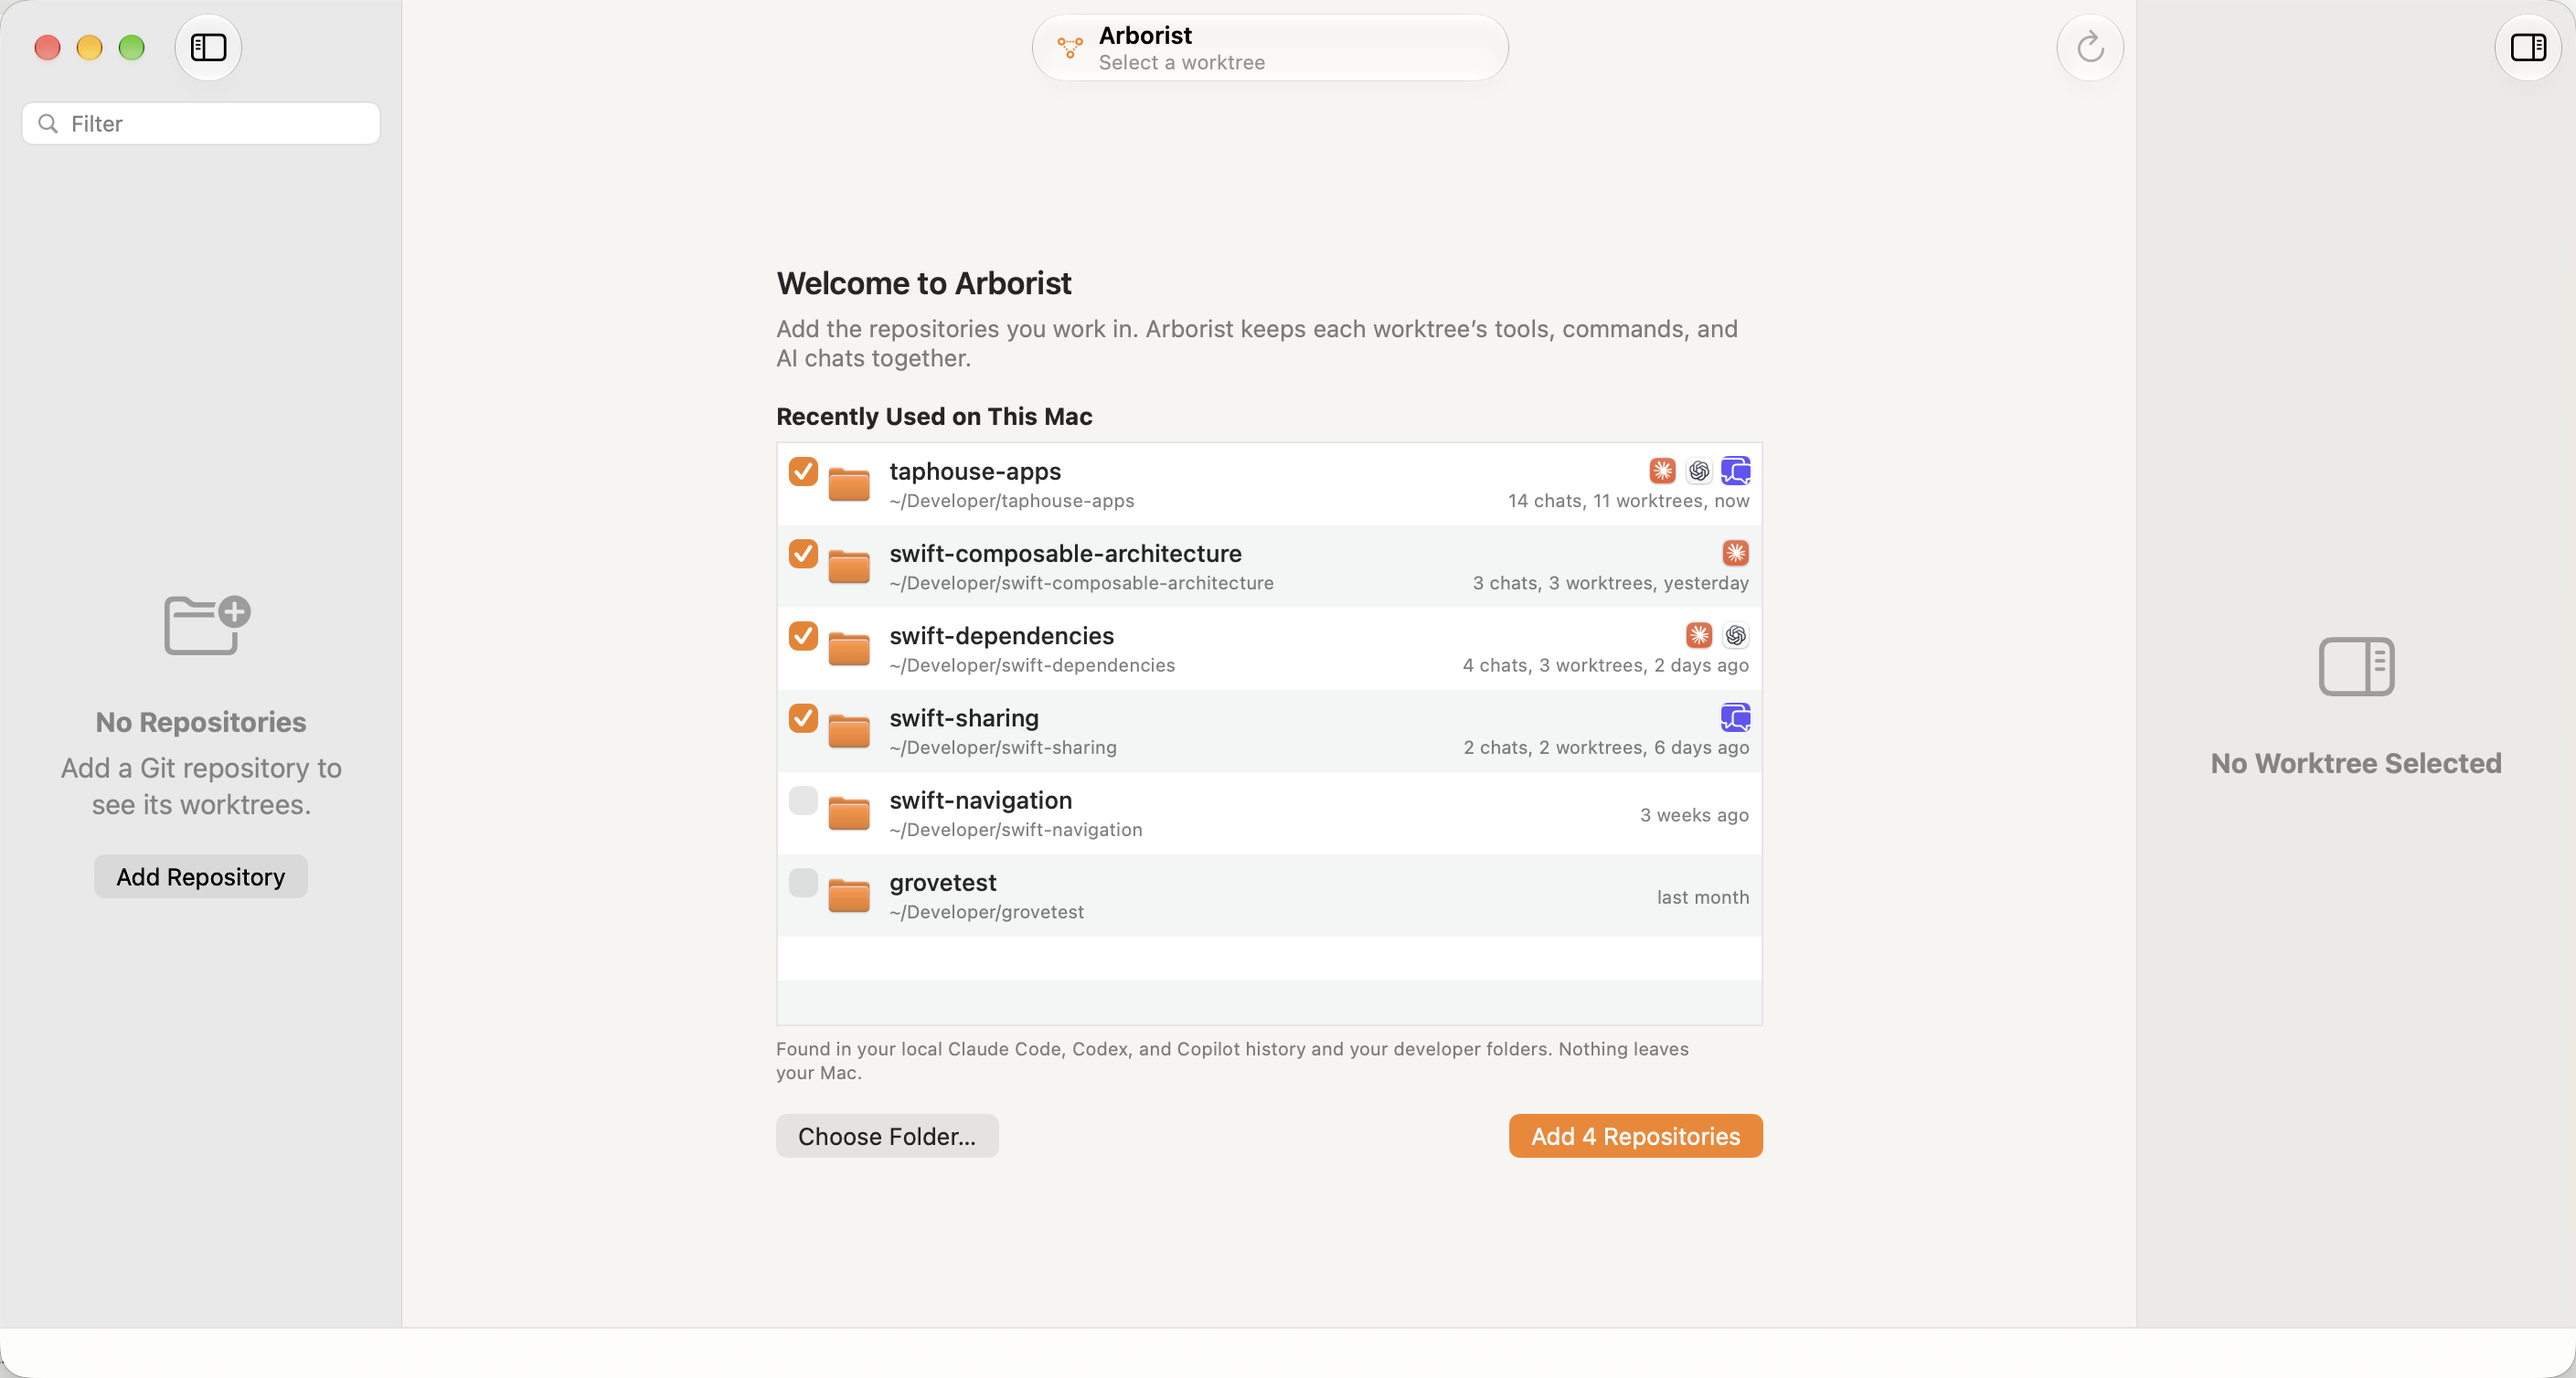
Check the repositories you want, then click the Add button below the list. If a repository you want isn’t listed, click Choose Folder… to pick it yourself. You can always add more later with File -> Add Repository (cmd-O), or by dragging a folder onto the Arborist window.
Finding these suggestions happens entirely on your Mac. Arborist reads only your chat history’s project information (not the chats themselves) and the .git entries in these folders, and nothing is sent anywhere. It also skips folders macOS protects, like Desktop, Documents, Downloads, and iCloud Drive, as well as external drives, so you won’t see a permission prompt. Repositories in those places can still be added with Choose Folder….
Adding Your Tools
Tools are the apps you open a worktree in, like your editor, Git client, and terminal. Until you’ve set up some tools, the tools area in the command center suggests apps that are installed on your Mac. The editor, Git client, and terminal you’ve used most recently are selected for you. Click a suggestion to select or deselect it, then click the Add button next to them.
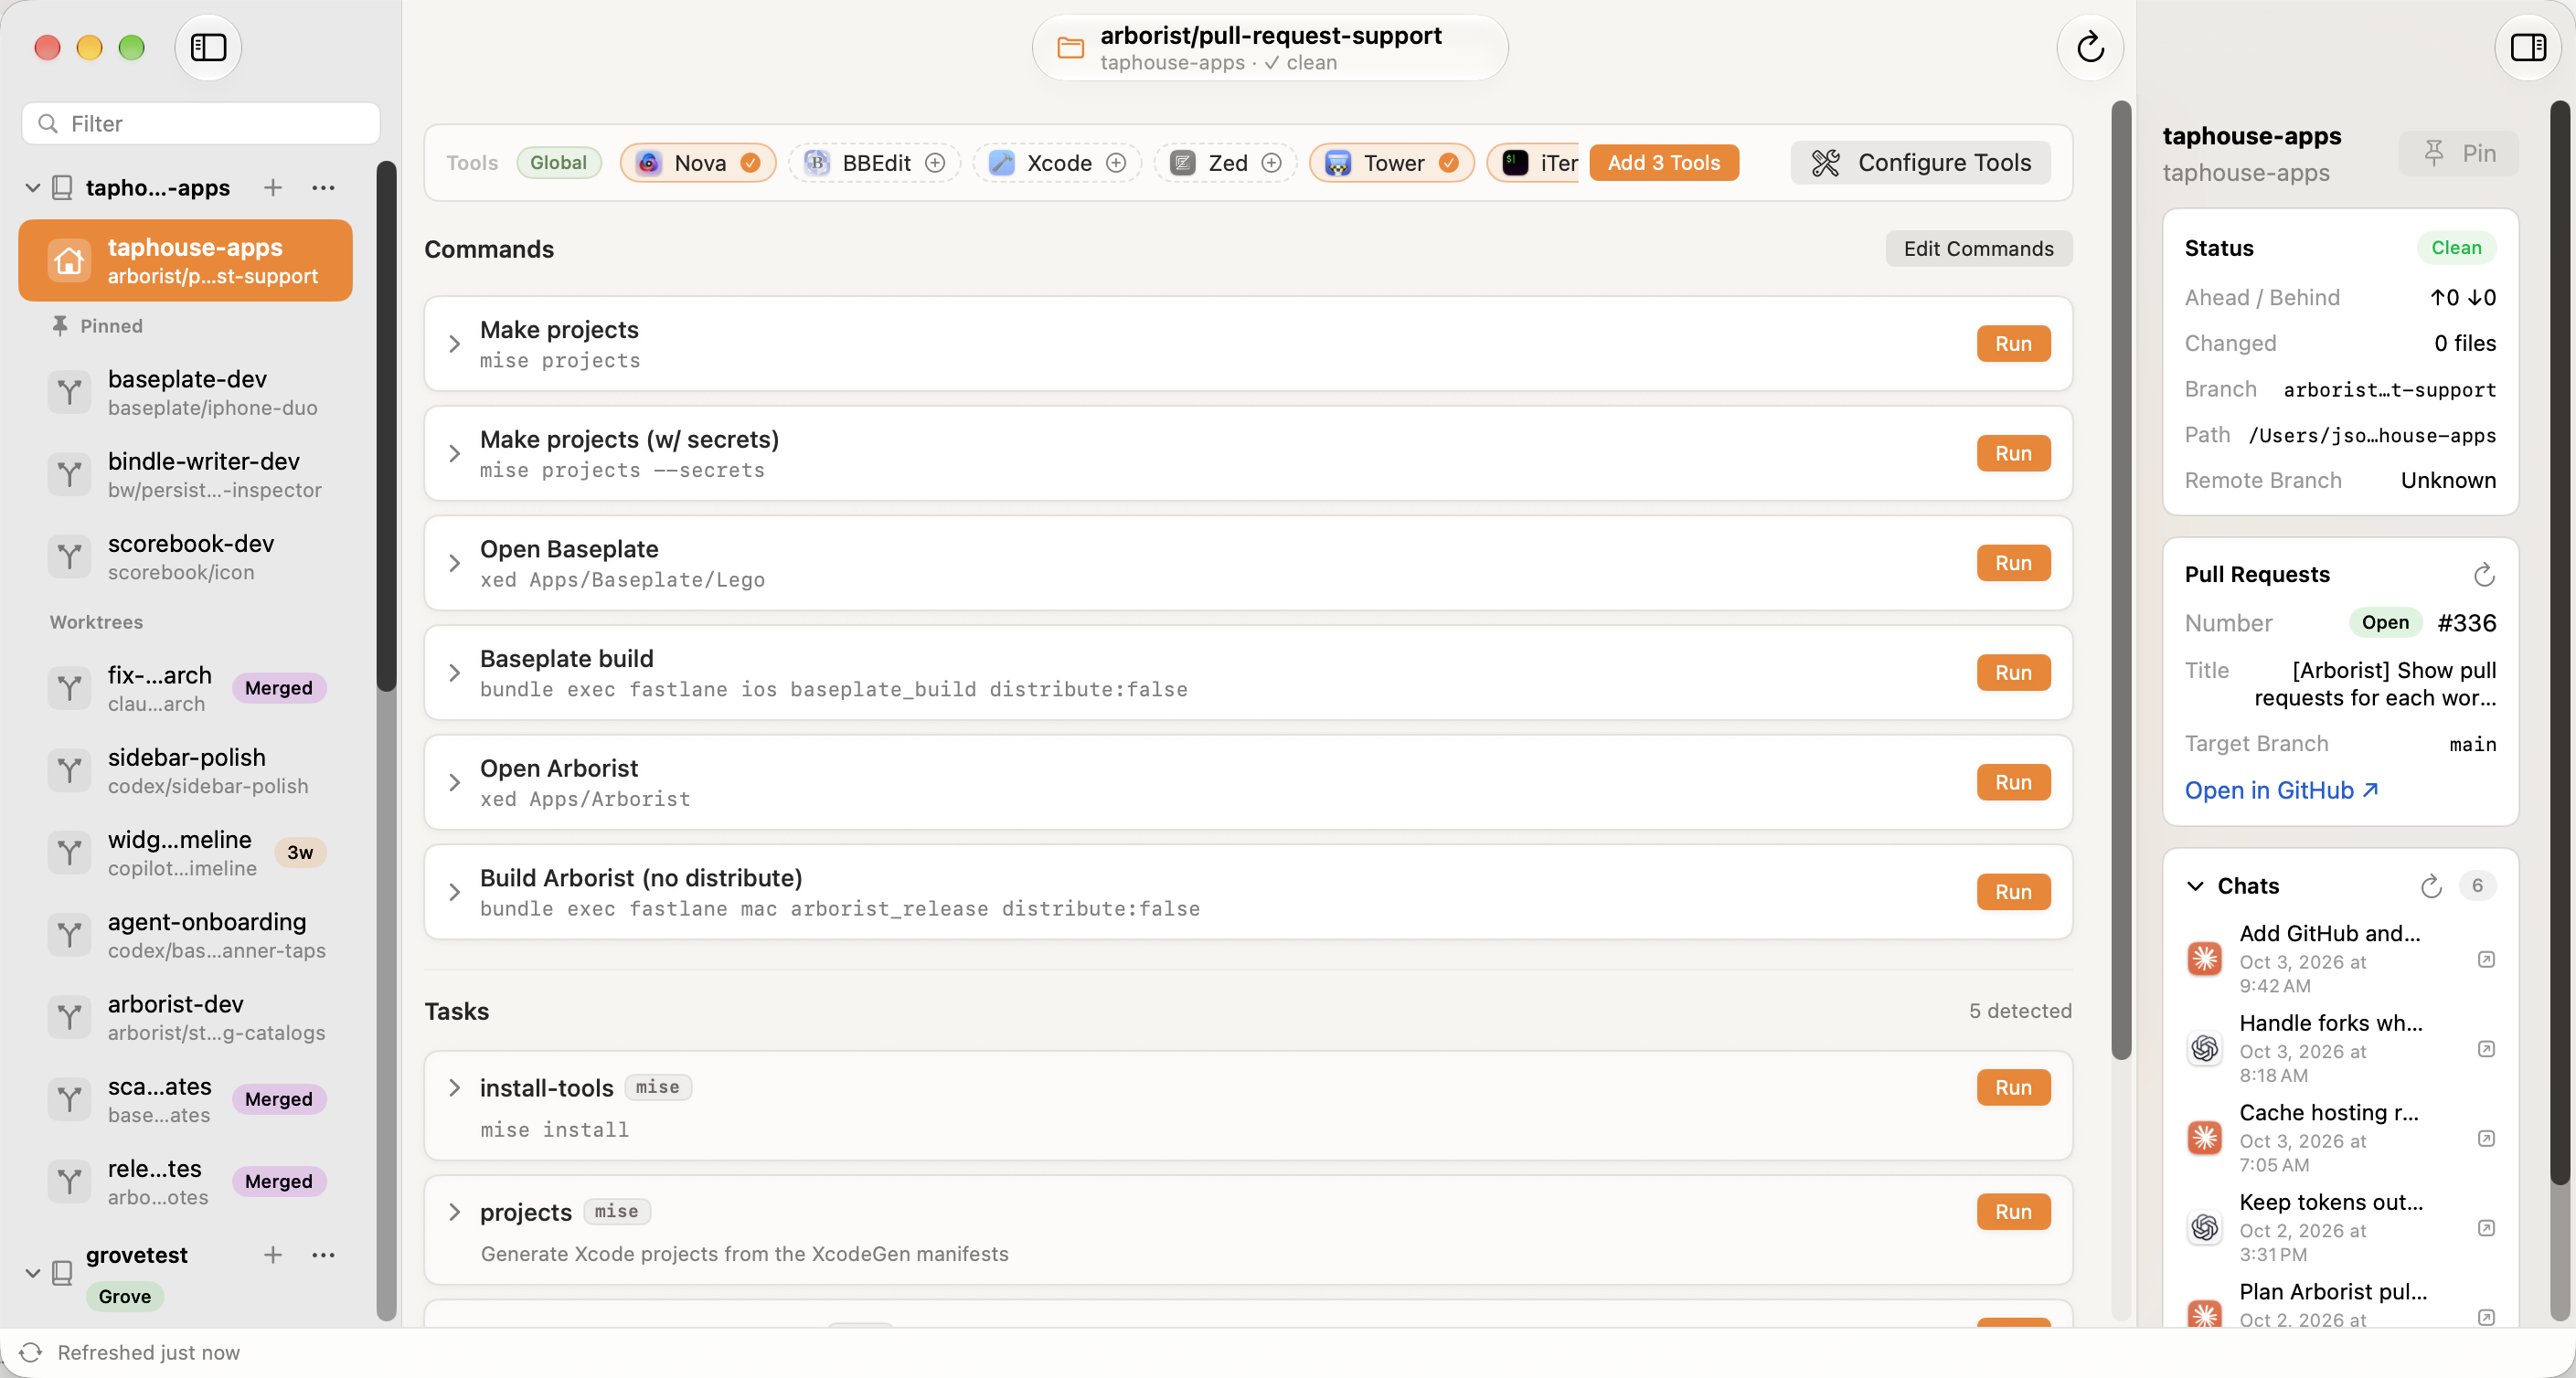
You can fine-tune these tools, or add any other app or executable, in the Tools pane of Settings.
Making Your First Worktree
A worktree gives a branch its own folder. That means you can have an agent working on one task while you work on another, without switching branches back and forth. When you select a worktree in Arborist, your tools, commands, and AI chats follow it.
If a repository only has its main checkout, Arborist shows a tip offering to make a new worktree. You can also choose New Worktree from the Repository menu (cmd-N), or New Worktree from Branch (shift-cmd-N) to start from a branch that already exists.
Once you have a few worktrees, take the Interface Tour to see how the sidebar keeps them organized. When you’re done with a worktree, Cleaning Up Worktrees explains how to remove it.